
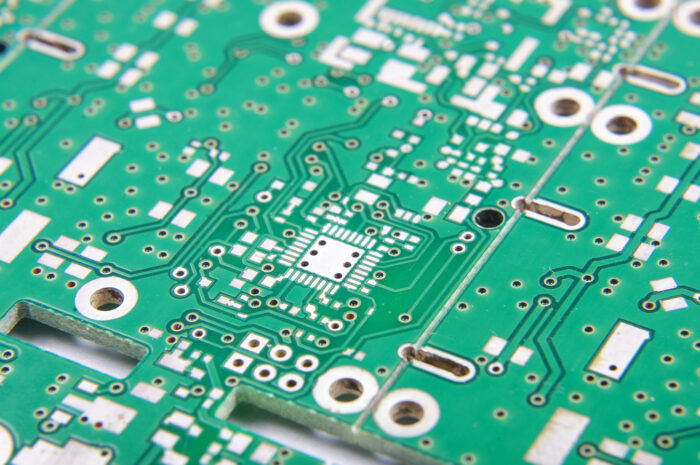
A printed circuit board is the heart of any electronic device. It is a thin plate on which various electronic components are mounted. A PCB is used to connect electronic components using pads and tracks.
Printed circuit board assembly is the process of mounting various electronic components on a PCB. The process can be done manually or using automated machines. It is a critical process in the manufacturing of electronic devices. If done correctly, it can result in a reliable and durable product. You can also take help for PCB assembly from professional such as https://uetpcb.com/turnkey-pcb-assembly/.
Several things need to be considered while doing PCB assembly. This article will discuss seven essential tips for beginner.
Starting As A PCB Designer: Seven Tips

As a beginner designer, you should keep a few things in mind to ensure your assembly goes smoothly. Here are seven essential tips to keep in mind:
1. Ensure The Trace Widths Are Set Before Designing
As a beginner in design, it is essential to know how to set trace widths before starting the design process. This is because the width of the trace will determine the current carrying capacity and the resistance of the trace. Therefore, getting the width of the trace right is essential to avoid any problems with the design.
There are a few things that you need to take into account when setting the width of the trace. Firstly, you need to consider the thickness of the trace. The thicker the trace, the wider it can be. Secondly, you need to consider the length of the trace. The longer the trace, the wider it must be to avoid resistance problems. Finally, you need to take into account the width of the board. The wider the board, the wider the trace can be.
2. Make Sure The Components Are Placed Correctly
In this second tip for beginner designers, we’ll discuss correctly placing components on your board. This may seem small, but getting it right can save you time and money.
When designing, you’ll need to place each component correctly. This is important for two reasons. First, it ensures that the components will function correctly. Second, it ensures that the PCB can be assembled correctly and without errors.
There are a few things to remember when placing components. First, make sure that they are appropriately spaced apart. Second, be sure to orient them in the correct direction. Third, make sure that all the pins are positioned correctly. And fourth, make sure that the components are placed in the correct order.
3. Set The Ground and Power Planes

As a beginner designer, it’s essential to understand how to correctly set the ground and power planes. This will ensure that your PCB design can function correctly and meet the required specifications.
Here are three tips to help you set the ground and power planes correctly:
- Ensure that all ground pins are connected to the ground plane
- Make sure that the power plane covers the entire PCB
- Use vias to connect the different planes
Following these tips will help you create a functional and reliable design.
4. Make Your Board Electromagnetic Interference-Proof
Any electrical device, whether a cell phone or a computer, is susceptible to electromagnetic interference (EMI). EMI is caused by the electrical and magnetic fields produced by the device’s components. When these fields interact, they can create electrical noise that can degrade or even damage the device’s performance.
Fortunately, there are steps you can take to minimize the effects of EMI on your PCB design. In this article, we’ll share four tips for beginner designers who want to reduce the effects of EMI on their boards.
- Use a ground plane.
- Use shielded Components.
- Avoid using long traces.
- Use vias sparingly.
5. Prevent Combining Lead-Free and Leaded Components
As the electronic industry starts to move away from leaded components, beginner designers must be aware of the potential problems that can arise from mixing lead-free and leaded components on the same board. Here are five tips to help you avoid any issues:
- Check the datasheets of all the components you use to ensure they are compatible.
- Pay attention to the maximum operating temperatures of the components. Lead-free components can have a higher maximum operating temperature than leaded ones, so you must ensure the board can handle the higher temperature.
- Make sure the board can dissipate the heat generated by the lead-free components. Lead-free components generate more heat than leaded components, so ensure the board has adequate cooling.
- Use vias to connect different parts of the board. This will help to spread heat evenly across the board.
- Use larger ground planes. This will help to reduce the impedance and prevent signal crosstalk.
6. Correctly Mark Silkscreens
As a beginner PCB designer, creating correct silkscreen markings on your PCBs is essential. This will ensure that your PCBs are correctly labeled and easy to read. Here are five tips to help you create correct silkscreen markings:
- Use the correct size and font for your marks.
- Make sure your marks are legible and easy to read.
- Use simple marks that can be easily understood.
- Make sure to overcrowd your PCB with enough marks.
- Test your marks before finalizing them.
7. Think About Heating Issues

PCB design takes work. You must consider a few things to design a PCB that will function well and not overheat. Here are five tips for beginner PCB designers:
- Make sure your copper traces are wide enough. The more comprehensive, the better; this will help conduct heat away from the components.
- Use vias to help improve heat dissipation. Vias are small holes connecting different PCB layers, and they can help dissipate heat better than solid copper traces.
- Use a thermal relief pad for heat-sensitive components. Thermal relief pads are made of a material that has a lower thermal conductivity than copper, which helps protect the components from heat.
- Use a ground plane. A ground plane helps to dissipate heat by providing a large surface area for heat to dissipate.
- Make sure your PCB has proper ventilation. This will help to keep the components cool and prevent overheating.
Bottomline
If you’re just getting started in PCB design, it’s essential to know key tips to help you get the most out of your assembly. In this PCB assembly guide, we’ve shared seven essential tips for beginner PCB designers. These tips will help you create better PCB designs, from understanding the basics to more advanced techniques.


